Dear Friends,
Windows 7 makes it possible to change the welcome screen that appears when you start your computer without any third-party software. But this setting is well hidden. You can set any image you like as your background. This setting is intended for original equipment manufacturers (OEMs) to customize their systems, but there’s nothing stopping you from using it yourself. All you have to do is change a single registry value and put an image file in the correct location.
Enabling Custom Backgrounds:
This feature is disabled by default, so you’ll have to enable it from the Registry Editor. You can also use the Group Policy Editor if you have a Professional version of Windows – scroll down a bit for the Group Policy Editor method.
Registry Editor Method:
Step1-
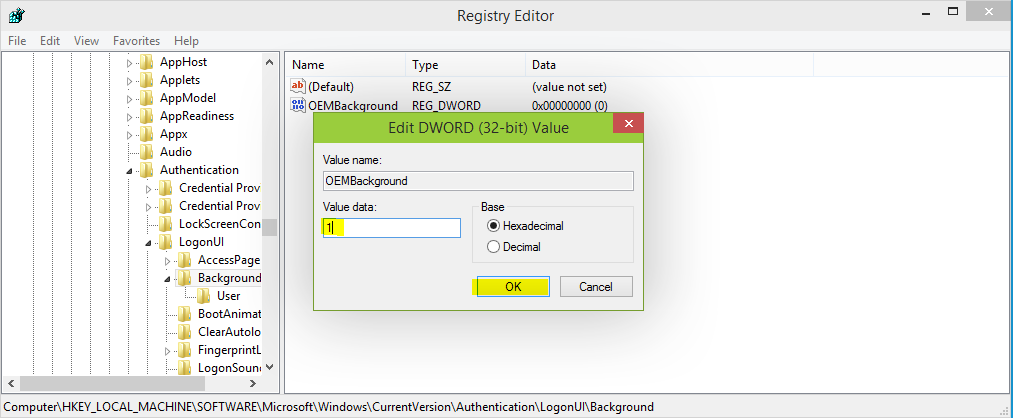
Launch the Registry Editor by typing regedit into the search box in the Start menu and pressing Enter. In the Registry Editor, navigate to the following key:
HKEY_LOCAL_MACHINE\SOFTWARE\Microsoft\Windows\CurrentVersion \Authentication\LogonUI\Background.
Step2-
You’ll see an DWORD value named
OEMBackground. If you don’t see it, right-click in the right pane, point to the New submenu and create a new DWORD value with this name. Double-click the
OEMBackground value and set its value to
1. Note that selecting a new theme in the Appearance and Personalization window will
“unset” this registry value. Selecting a theme will change the value of the key to the value stored in the theme’s
.ini file, which is probably
0 – if you change your theme, you’ll have to perform this registry tweak again.
Group Policy Editor Method:
Step1-
Changing the setting in
Group Policy will allow it to persist even when you change your theme, but the
Group Policy Editor is only available in Professional editions of
Windows. If you have access to the
Group Policy Editor, launch
gpedit.msc from the
Start menu->Run.
Step2-
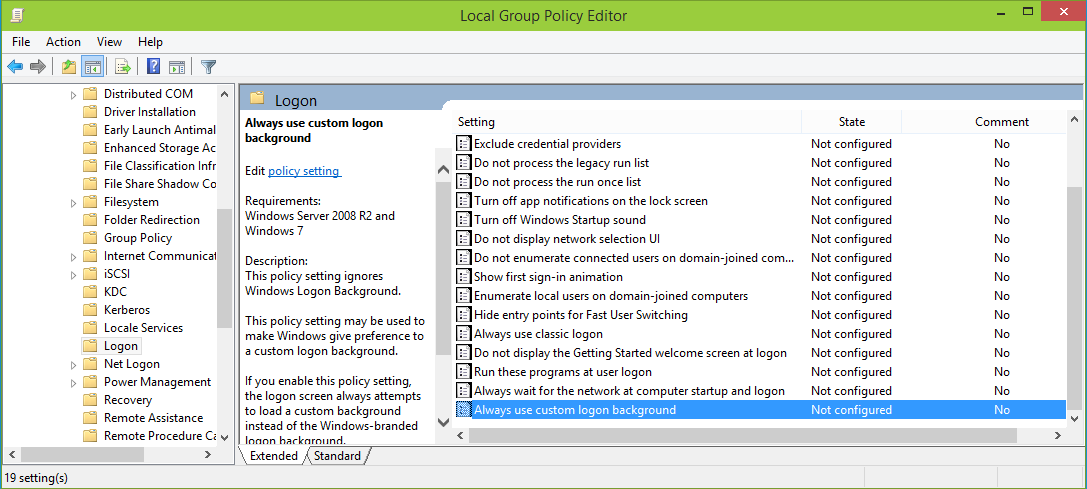
Navigate to the following section in the Group Policy Editor window:
Computer Configuration\Administrative Templates\System\Logon. You’ll find a setting named
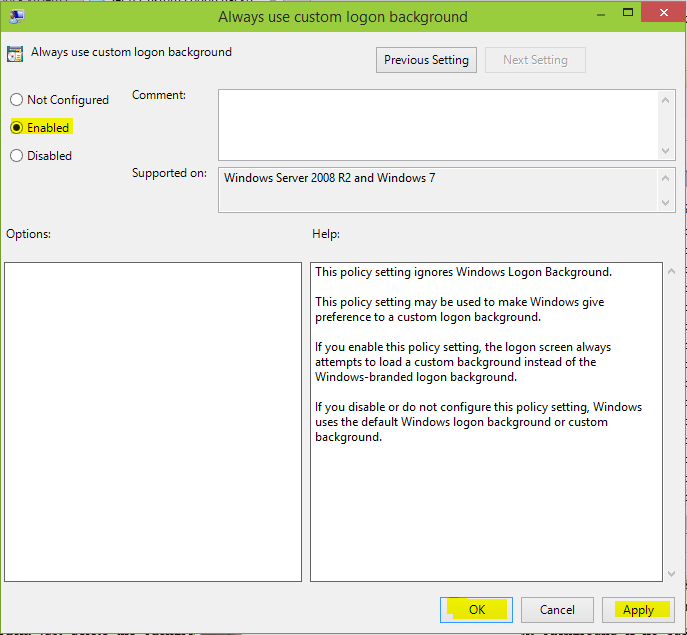
Always use custom login background. Double-click it and set it to
Enabled.
Get Your Background Image At The Right Place:
Your image file must be less than 256 KB in size. It’s also a good idea to use an image file that matches the resolution of your monitor, so it won’t look stretched.
Step1-
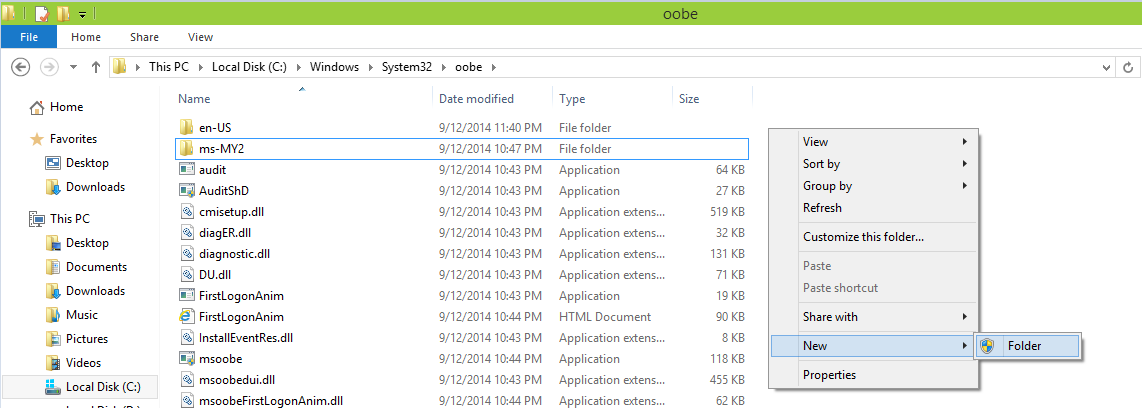
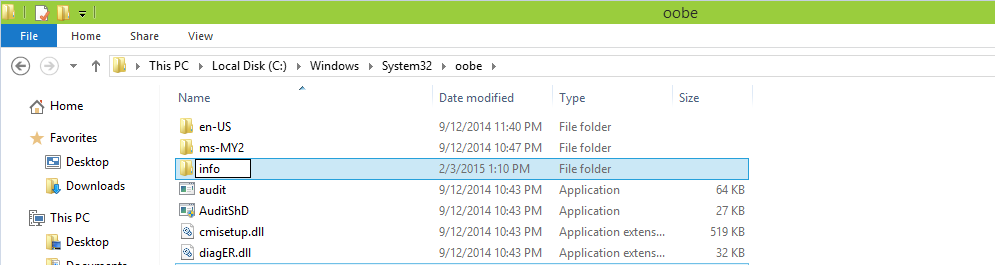
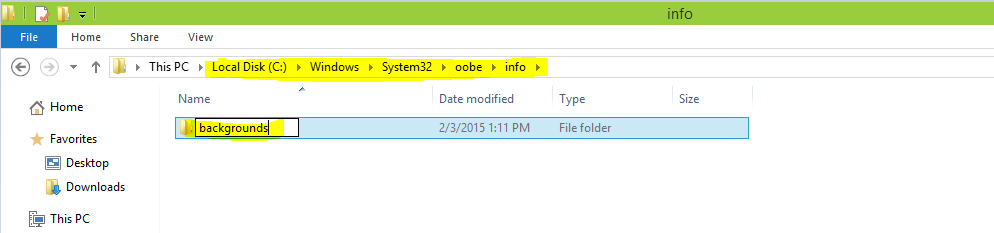
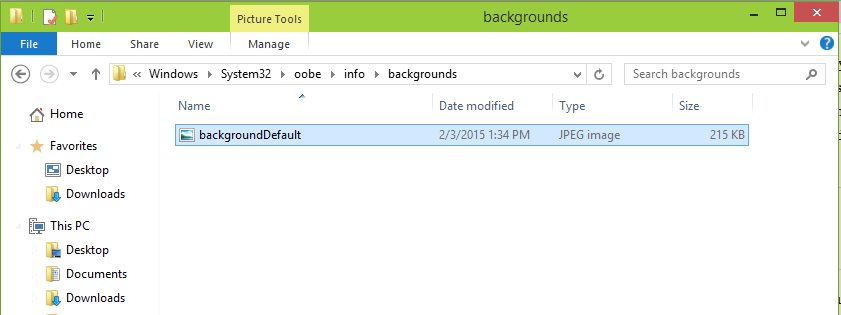
Windows looks for the custom logon screen background image in the following directory:
C:\Windows\System32\oobe\info\backgrounds. By default, the
info and
backgrounds folders don’t exist. Navigate to the
C:\Windows\System32\oobe folder and create them yourself by right-clicking inside the folder, pointing to New, and selecting New Folder. Copy your desired background image to the backgrounds folder and name it
backgroundDefault.jpg.
Step2-
The change will take effect immediately – no system reboot required. The first time you log out or lock your screen (try the WinKey-L keyboard shortcut), you’ll see your new background. To get the default logon screen back, just delete the
backgroundDefault.jpg file. Windows will use the default background if no custom background image is available.

Enjoy! Write your problems in comments.
UNDER MAINTENANCE


